We just finished breakfast and we’re cooking again?? Yes, friends. It’s lunch time.
For some reason, when I have guests, lunch seems to catch me off guard. I’m so busy de-thawing my pastries and planning dinners suited to everyone’s tastes that I forget my guests need to eat a midday meal. Also, I feel like I haven’t even gotten the breakfast mess cleared up before it’s 11:30 and people (my children) are starting to get hangry.
Lunch exists within people’s unique daily routine. It’s a meal to eat what you like, catered exclusively to your tastes and diet. It may be one of the only breaks in your day, or at the very least, a prelude to a break. Some people eat at their desks, some eat with co-workers. Some eat in the company of their favorite novel. Nearly no one in our day and age takes lunch as a sit-down meal with family. Personally, I like to eat at around 2:00 p.m. by myself because as a stay-at-home-parent of toddlers, I find it vital to my humanity to have one meal that I am not supervising and/or wearing. Considering all of this, planning lunch for a crowd is oddly challenging.
The answer to this challenge is to make what you love. (And make it ahead of time.) It will be impossible to cater to everyone’s normal lunchtime routine, and they are at your house to visit you, so present them with a little bit of yourself! (No cannibalism necessary…) Personally, my favorite lunches are mess salads and leftovers. Because it’s pretty weird to serve your guests last week’s casserole, today I present Grandma’s Mac & Cheese and Thai Chicken Salad for a Crowd. Bonus no-cook “recipe” is the Ploughman’s Lunch, American style
Another thing to remember about lunch is that everyone enjoys a little downtime afterwards (including you). It’s been a lot of togetherness and people (including you) will very much appreciate some time to do their thing. Pass out the WiFi password, point people to your magazines and books, hand over the remote, make sure there are blankets for those who want to rest their eyes, and let everyone go to their corners for an hour or two (including you).
Grandma’s Mac and Cheese
My Grandma is an amazing woman – strong, generous, comforting, and wonderful. She would give her life for every family member and skin the hide off of anyone who crossed them. The vast belief she has in those she loves, and the quiet expectation that they will be the best version of themselves has been encouragement beyond measure, and has shaped who I am. I can only hope I have inherited the iron backbone, limitless love, shrewd smarts, and capacity for kindness that are the hallmarks of the Young women.
It is only appropriate that this wholly comforting, stick-to-your-belly, no-nonsense, wonderful recipe is handed down from her.
Grandma’s Mac & Cheese
Serves 6-8
~Can be prepped before: Prep time: 20 minutes Bake time: 50 minutes Total time: 1 hour, 10 minutes
Ingredients:
- 1 lb shredded sharp cheddar cheese*
- 4 TBS butter
- 1/4 to 1/2 cup milk
- Ketchup – a couple of squirts
- 1 small box of macaroni noodles
- 4 slices of bread, buttered on both sides and cubed
Method:
Preheat oven to 325*
Put first 4 ingredients into a medium saucepan and cook over medium low heat until cheese is melted and sauce is pretty smooth. Stir often**
While the cheese sauce is melting, bring water to a boil in a large saucepan and cook noodles according to package directions. Do not overcook as they will continue to cook in the oven. Drain and set aside.
Pour noodles into a casserole dish. Stir in cheese sauce, arrange croutons over top. Bake uncovered for 50-60 minutes***
Goes beautifully with a big fresh salad and baked sausage
Baked Sausage:
Ingredients:
- Smoked Sausage (1/4 lb per guest)
- BBQ Sauce
Method:
Cut up sausage. Put in oven-safe dish. Pour BBQ sauce over top. Bake in oven with Mac & Cheese
*Do not, I repeat do NOT try to substitute mild cheddar or low-fat cheese in this recipe. It will bake into a disgusting, gum-like consistency. I know, I know… butter, full-fat cheese… I watch what I eat too. Take a nice scoop of this real-deal Mac & Cheese and fill the rest of your plate with salad. It’s worth it and one scoop does not contain all the butter. It’s okay.
**Seriously, low heat and stirring is the key. So many times I cooked it too long/too high and the oil separated from the cheese. If that happens, whisk it back in. You do need the fat for the cheese to bake properly. See above.
***You can prep this up to 4 days before serving. Don’t bake it. Take it out of the fridge while you’re making breakfast and put it in the oven an hour before lunch.
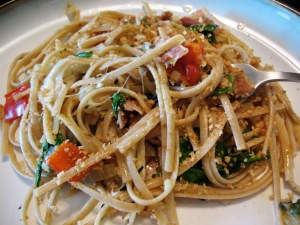
Thai Chicken Salad
Serves 6-8
Total Time: 20 minutes (35 minutes extra if you are cooking chicken beforehand)
Ingredients:
For Salad
- 4 chicken breasts, cooked and sliced*
- 1 cup cucumber, chopped
- 1/4 cup mint
- 1 cup mango, chopped
- 1 red chili pepper
- 1/2 cup spanish peanuts, regular peanuts or slivered almonds
- 1 bag broccoli slaw
- 2 small bok choy OR 2 heads romaine lettuce, chopped into small strips
For Sauce
- 1 tsp fish sauce**
- Juice from 2 limes (or 2 TBS lime juice)
- 1 TBS honey
- 2 TBS peanut butter
- 2 TBS soy sauce
- 1 pinch red pepper flakes
- 2 TBS Olive Oil
Egg Rolls
- Your favorite frozen egg rolls. I like Tei Pei Vegetable Egg Rolls
Method:
If you are serving egg rolls, turn on oven and bake according to package directions (they will take about 20 minutes)
Mix all sauce ingredients in a large bowl. Experiment with taste. Add water or oil if you think you need more dressing. Heat in microwave just before serving. Serve in a syrup pitcher, gravy boat, or salad dressing bottle
Mix lettuce, bok choy, slaw, and mint*** and put in a large salad bowl. Put all other ingredients in little bowls with spoons. Serve salad-bar style (This way, if people don’t care for a certain ingredients, they can skip them. You can put out your other bottled dressings as well.)
*Up to 4 days ahead, prepare chicken breasts. Put chicken breasts in a 8 x 8 glass dish. Sprinkle with ginger, garlic powder, salt, and pepper. Pour a little bit (1/4-1/2 cup) of chicken broth on bottom of dish. Bake uncovered in a 350* oven for 35 minutes. Cut one to check for doneness (no pink). To serve, cut into thin slices and arrange in circles on a salad plate. Place some cherry tomatoes, grapes, cucumber slices or something in the middle since a plate of cold beige meat can look pretty gross. OR, buy a rotisserie chicken and shred it.
** “Katy, I don’t have fish sauce. I don’t even know what it is.” I didn’t either. You’ll find it in the Asian section of your grocery store. Pick up a bottle, as well as a bottle of Sriracha chili sauce and you’ll never have buy one of those little stir-fry spice packets again.
*** “Crap! I forgot the mint!!” It’s fine. I have too and the salad still tastes great. The mint just adds a depth of flavor and cools off the spices. Try to remember the lime juice though if that’s not a staple in your fridge.
Ploughman’s Lunch, American Style
Traditionally, Ploughman’s Lunch was a term for an English midday snack consisting of cheese, bread, and chutney. Meat was soon added as were boiled eggs and pickled onions.
What we’re about to do is more of a deli spread, but “Ploughman’s Lunch” sounds so much more fun.
Ingredients:
- Lunchmeat: 1/4 lb per person per lunch*
- Bread: 1 loaf per lunch per 6 people
- Sliced cheese
- Romaine lettuce
- Hot house tomatoes
- Other sandwich toppings you love
- Condiments (pickles, mayo, mustard, chutney, etc.)
- Chips
- Sliced stone fruit (apples, peaches, etc.)
Method:
Arrange meat and cheese on a plate. If you’re concerned with making it look pretty, fold slices of meat in half and arrange in a semi-circle, folded edge out. Arrange cheese similarly, no folding. Rule of thumb: in home decor, neutral colors look good. In food decor, neutral colors (brown, beige, cream) look gross. Always add a pop of color (in this case, yellow and orange cheeses) to a plate of beige food.
Slice tomatoes and lettuce and place on a plate. If you’re getting fancy, salt and pepper your tomatoes.
Set out bread, toaster. Set out condiments.
Put out chips (in bowl if you want) and fruit on plate.
Invite everyone to help themselves.
*I cut cost corners whenever I can. One of the only times I buy the pricey stuff is when it comes to lunchmeat. I really like Boarshead at my grocers deli counter. At about $1.50 more per pound than the store brands, it actually doesn’t cost that much more and is soooooo much better. No slime, no weirdness, great flavor.
If you don’t know what to buy for your crowd, stick to basics and variety: Smoked ham, smoked turkey, and a third wildcard (salami, roast something, spicy something – ask for a recommendation) Same goes with cheeses (Mild white, mild yellow, and wildcard (Swiss, Pepperjack)
See! You’ve done it! You’ve served lunch and gotten to eat something you love! Now go take your much deserved siesta before we return for Dinner.
What is your favorite everyday lunch? What would you eat for lunch if you could have anything?